

Azure App Service is a fully managed platform as a service (PaaS) that lets you run web applications, mobile back ends, and RESTful APIs.
App Service can run on Linux and Windows and supports a number of web stacks, including Node.js, PHP, Java, and .NET. Or, if your app is containerized, you can just deploy it as a custom container.
We will be deploying a sample website using Azure App Services, GitHub and Git via Visual Studio Code. The sample website can be gotten from Themewagon.
Unzip the downloaded file from Themewagon to a location on your PC.
Step 1: GitHub
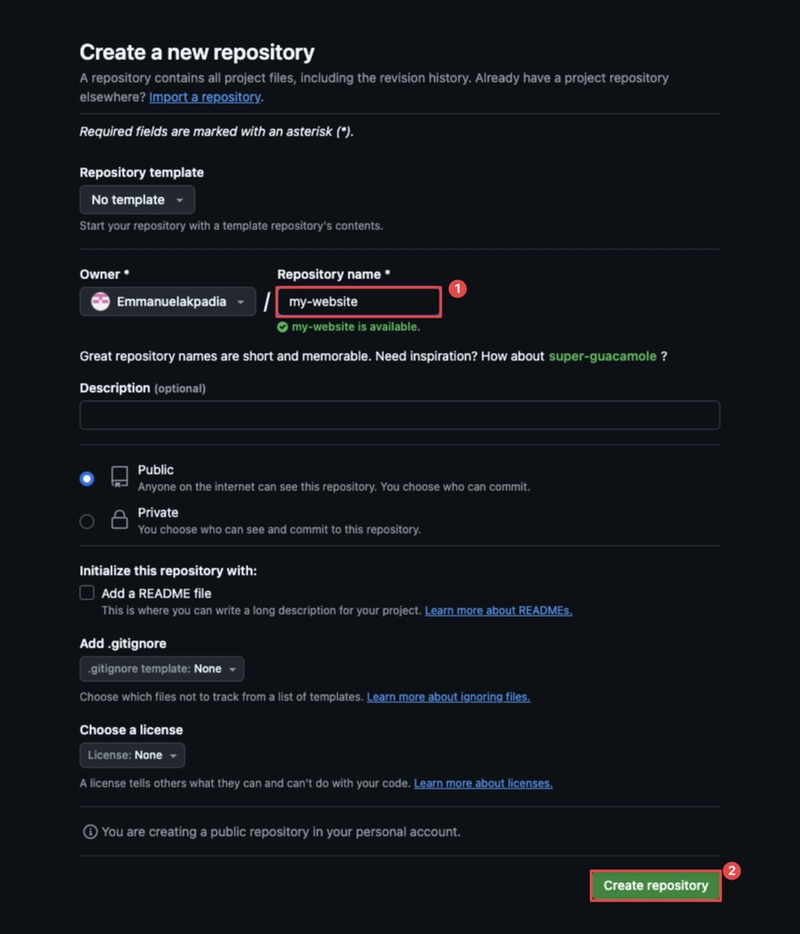
- Create a new repository in GitHub
Step 2: Git
In the Visual Studio Code app, open the folder where you unzipped the sample folder to.
Next, open the terminal; the folder opens as the default directory in the VS Code terminal
- First, we initialize Git. (Ask Git to track changes in this folder.)
$ git init
- Next, we add all the files in the folder to the staging area
$ git add .
- Then create a commit using
$ git commit -m "my first website commit"

- We check the status of the commit using
$ git status
- Next, we go to our GitHub page to copy the next command to link our Git to our remote repository on GitHub.

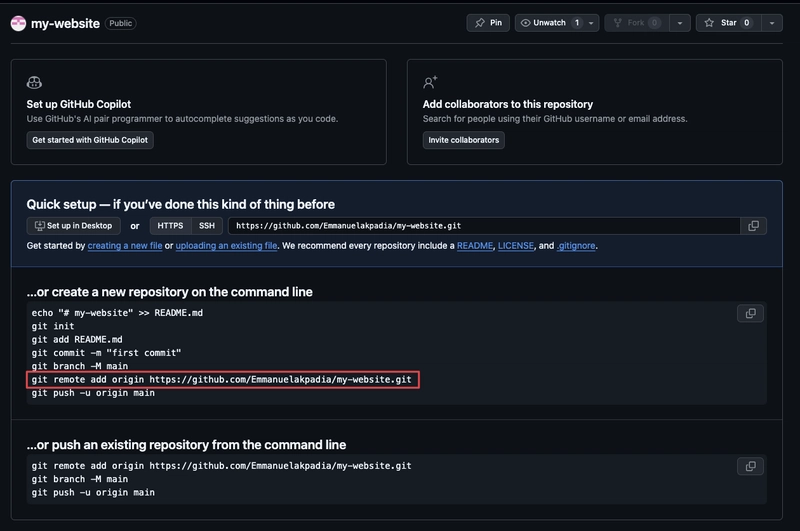
- Lastly, we push our code to GitHub.
$ git push -u origin master

Step 3: Azure App Services
To host our WebApp on Azure App Service, we need to create an App Service Plan first.
- First, create a new resource group (1) and a name for the App Service plan (2).
- Then select a region (3) and pricing plan (4), then review and create the resource.

Now we can create the App Service.

Search for App Services on the Azure portal and open it, then click on Create > WebApp.

- First, we select the resource group (1) and create a name for our WebApp (2).
- The runtime stack we are selecting is PHP 8.4 (3), and we select the same region (4) as our App Service plan. The pricing plan automatically changes to our app service plan.
- Next, review and create.
Once the resource is deployed, go to the overview page.

A default domain is created for our web app. If you copy and paste the address to a new tab and load it, a default PHP page will show, awaiting your deployment.

Step 4: Connect Azure WebApp to Remote Repo (Github)
- On the overview page, select Deployment Centre (1).
- Then select the remote repository source (2). Sign in and authorize your GitHub account (3), then select the organisation (4), repository (5) and branch hosting the sample website code (6).
- Next, select Add a workflow (7), which uses the Azure default deployment workflow.
- Then save.

A build/deploy log starts running.

On the GitHub platform, the workflow starts running.

The deployment gets completed after a few minutes.

If we reload the PHP default page, our content will be running.
