

p5.js is a friendly tool for learning to code and make art. And in this post we'll guide you through the steps for building your own interactive solar system simulation using ChatGPT.
Step 1: Gather your information
Before writing your prompt, you want to decide:
- Which planets will you include? (e.g. Sun, Earth, Mars, Venus, Moon)
- What are their colors, sizes, and orbits?
- Do you want extra effects like stars or trails?
For this sketch, we decided to go with the following prompt:
write a p5.sketch showing the sun in the middle and the earth orbiting the sun in a circular path. Use the sample code below that generates a rotating earth sphere with points:

let angle = 0;
let points = [];

function setup() {
 createCanvas(400, 400);
 colorMode(HSL);
 strokeWeight(2);

 // Generate points on sphere using lat/lon
 let detail = 10; // lower = more points
 for (let lat = -90; lat <= 90; lat += detail) {
 for (let lon = -180; lon <= 180; lon += detail) {
 let radLat = radians(lat);
 let radLon = radians(lon);

 // Convert spherical to Cartesian coords
 let x = cos(radLat) * cos(radLon);
 let y = cos(radLat) * sin(radLon);
 let z = sin(radLat);

 points.push({ x, y, z, lat, lon });
 }
 }
}

function draw() {
 background(9);
 translate(width / 2, height / 2);

 strokeWeight(3);

 let radius = 150;
 angle += 0.01;

 for (let pt of points) {
 // Rotate around Y axis for globe spin
 let rotatedX = pt.x * cos(angle) + pt.z * sin(angle);
 let rotatedZ = -pt.x * sin(angle) + pt.z * cos(angle);
 let rotatedY = pt.y;

 // Perspective projection (simple)
 let distance = 2;
 let zOffset = rotatedZ + distance;
 let px = (rotatedX / zOffset) * radius;
 let py = (rotatedY / zOffset) * radius;

 // Simple coloring: blue for ocean, green for land by lat/lon heuristic
 // This is a very rough approximation of continents
 let ocean = abs(pt.lat) > 60 || (pt.lon > -60 && pt.lon < 60 && pt.lat < 20);
 if (ocean) {
 stroke(210, 100, 60); // Ocean blue
 } else {
 stroke(120, 70, 40); // Land greenish
 }

 point(px, py);
 }
}
Step 2: Create your Sketch
Paste the code into the p5.js Web Editor to see it in action.

Step 3: Test your Animation
Run your sketch in the p5.js web editor. Test the animation:
- Do planets orbit correctly?
- Are trails smooth?
Tweak speeds, sizes, and visuals until it feels right.
Step 4: Customize your idea
Once your solar system is working well, then try to expand on your idea to take it even further:
- Add Mars, Venus, or other planets
- Use shaders or gradients for visual effects
- Implement user controls (toggle trails, adjust orbit speed)
- Add interactive click events for comets or stars
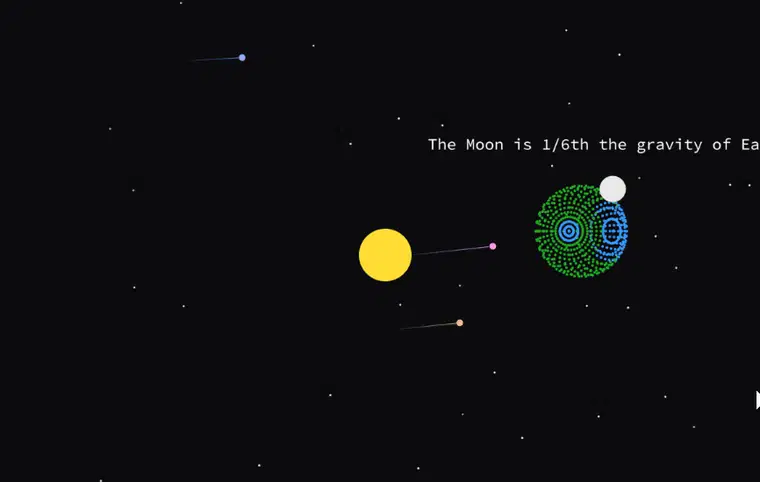
For e.g. you can modify the sketch to include a planetary fact about the Moon is displayed (e.g. in a small tooltip or HUD text).
Github 👉 https://github.com/JavascriptDon/P5-Sketch-Examples/tree/3D-Solar-trails


[hidden by post author]